How to use OpenAI's API in your browser
OpenAI's API is really fun to play with, especially checking out the streaming LLM responses. However, it can be a bit complicated to test in your browser — unless of course if you use Slingshot.
These are the steps you need to take to do so:
- Create an OpenAI API key
- Import their API spec into Slingshot
- Safely store your API key in an environment
- Play
Create an OpenAI API key
To create an OpenAI API key, it's required that you have an OpenAI account and have enabled billing. When this is done and you're logged in, create an API like so:
- Go to https://platform.openai.com.
- In the top-right corner, click the cog-wheel icon.
- In the left sidebar, click "API keys".
- Click the button "Create new secret key" in the upper-right corner.
- In the modal that shows up, provide a name for your key.
- Make sure that "All" is selected under "Permissions".
- Click "Create secret key".
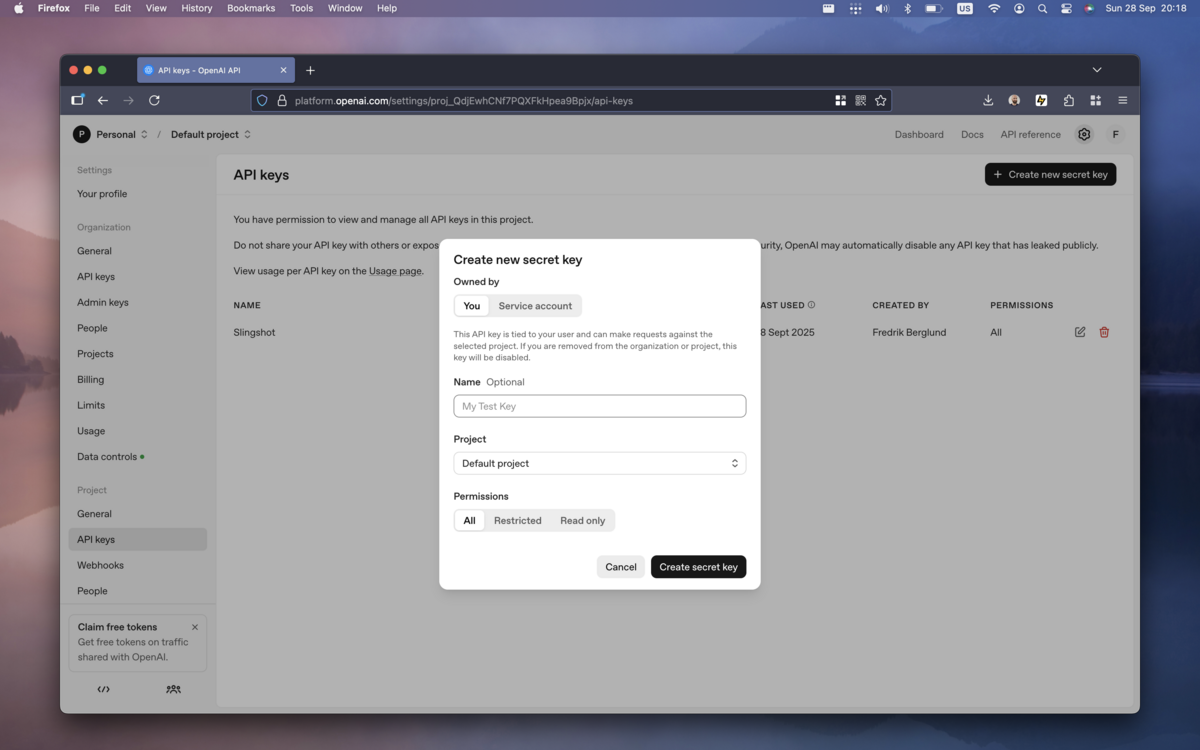
Now you have an API key that you'll use shortly.
Import their API spec into Slingshot
OpenAI kindly stores an up-to-date OpenAPI spec for their REST API on GitHub. It can be found here, and you can import it directly into Slingshot by clicking this link.
When doing so, you will be prompted whether you want to import the OpenAPI spec and create a collection out of it and if you want to provide an optional name. If you don't provide one, Slingshot will pick the API title from the spec itself.
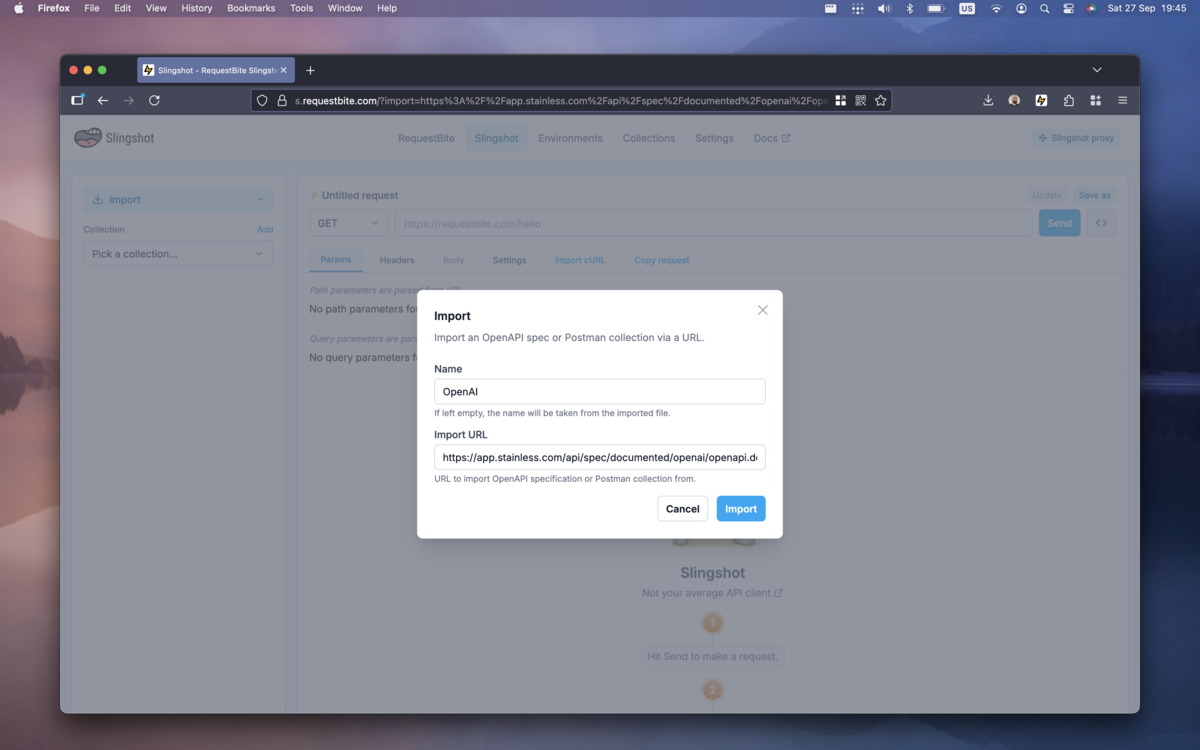
Click the "Import" button and you will now have access to all OpenAI API endpoints.
Now it's time to add your API key to Slingshot.
Safely store your API key in an environment
Slingshot environments allow you to store credentials and variables encrypted in your browser. They're the safest and most convenient way to store and use an API key (or any other credential) in Slingshot. While you can store your API key as a collection variable and use it manually in each request, environments are purpose-built for credentials and will always be used for the requests in a collection that use the environment.
To create an environment, select Environments in the menubar at the top of the screen. If you haven't already, you will be prompted to provide a password that will be used to encrypt your credentials:
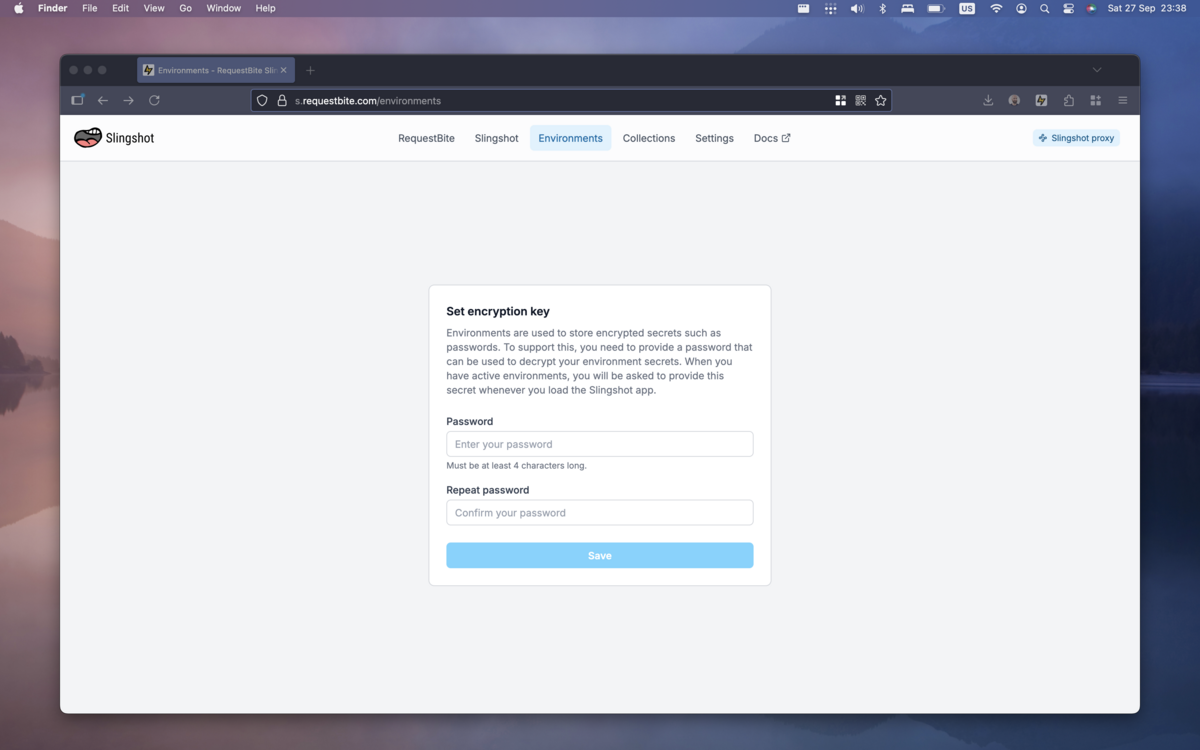
Now you have access to environments.
- Click "Add Environment" to create a new one.
- In the modal that shows up, type "OpenAI" in the "Name" field and click "Create".
- Open the newly created environment by clicking it.
- Select "Auth" in the sidebar.
- In the dropdown, pick "Bearer Token".
- Paste in the API key in the field "Token".
- Click "Save".
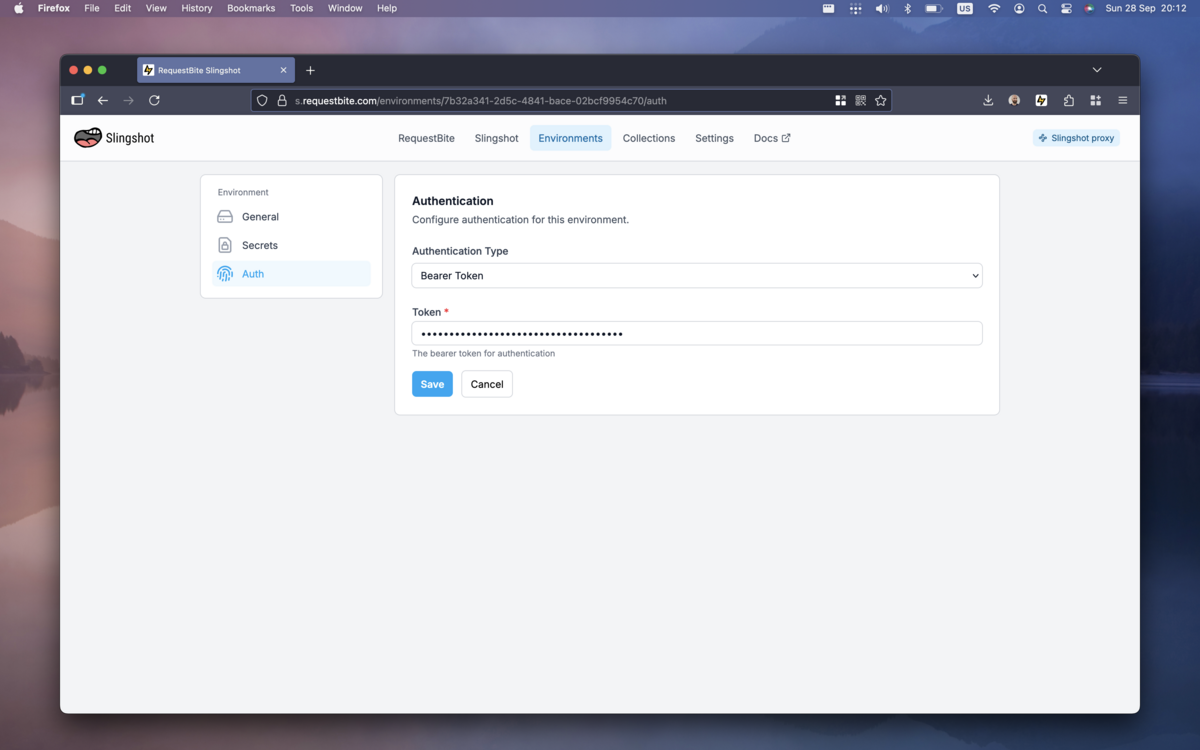
You have now created an environment with your OpenAI API key that you can use for your newly imported OpenAI collection.
Play
Now you're set to start playing with the API:
- Click Slingshot in the menubar at the top of the screen.
- In the sidebar, make sure "OpenAI" is selected in the "Collection" dropdown.
- In the "Environments" drodpown just below, select your newly created "OpenAI" environment.
- Click the button "Make default".
- This will make Slingshot always pick this environment when you select the OpenAI collection, something that will make your life easier if you use this collection a lot.
Test streaming chat responses
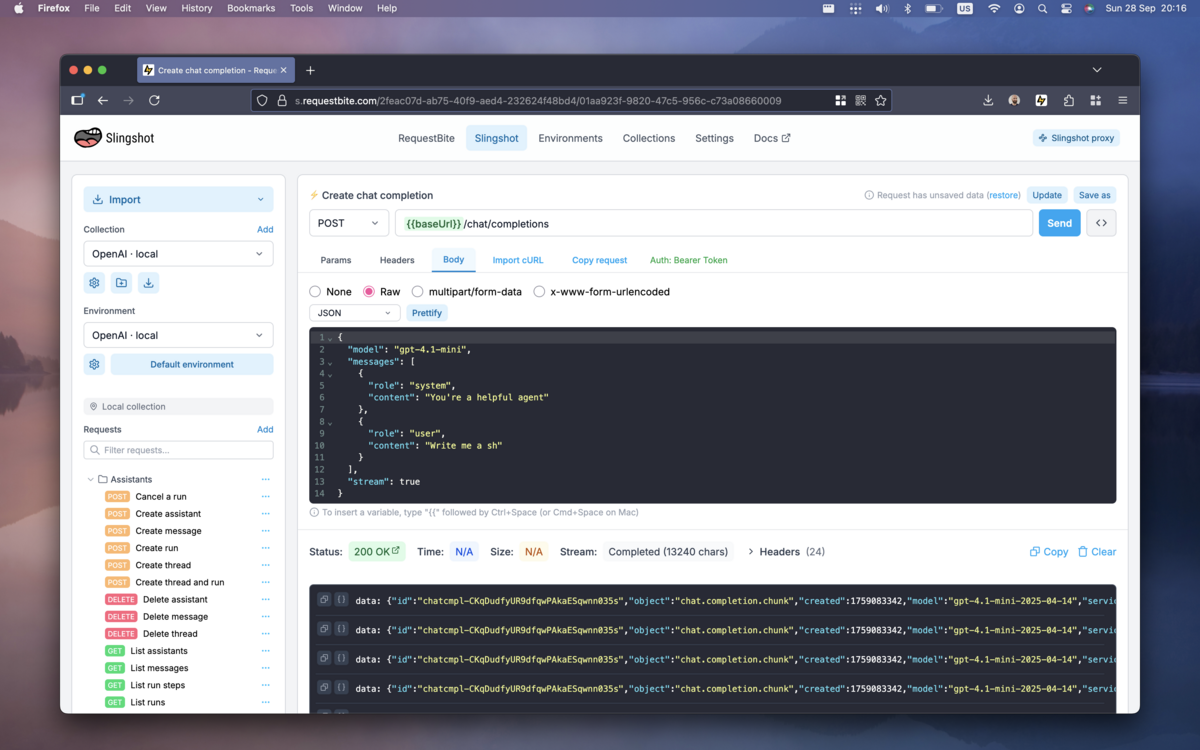
To test the API's streaming chat responses, pick the request called Chat > Create chat completion (the easiest way to find it is by just searching for it in the search field in the sidebar).
Click the "Body" tab in the request editor and paste the following request body:
{
  "model": "gpt-4.1-mini",
  "messages": [
    {
      "role": "system",
      "content": "You are a helpful assistant."
    },
    {
      "role": "user",
      "content": "Write me a short poem about the sea."
    }
  ],
  "stream": true
}
Now when you click "Send" you will see the response from the LLM being streamed back quickly to Slingshot. If it's a long response, it will fill your screen and Slingshot will automatically scroll the screen for you so you can easily follow along.
Generally the LLM response is so fast it's hard to "interact" with it, but for slower responses Slingshot offers two buttons in the bottom right corner of the screen while the stream is active:
- Stop Scroll
Will stop the automatic scrolling so you can continue to interact with the app. - Cancel Request
Allows you to cancel long-running SSE responses.
While the streaming responses are interesting from the point of view of
integrating into a chat app, they make it hard to see the actual LLM output in
Slingshot. To disable treaming and just see the final output, set the field
stream to false like so:
Now if you hit "Send" again you will notice that the response takes longer (as it's buffered), but when it's actually returned you get the full LLM response in one single JSON output.
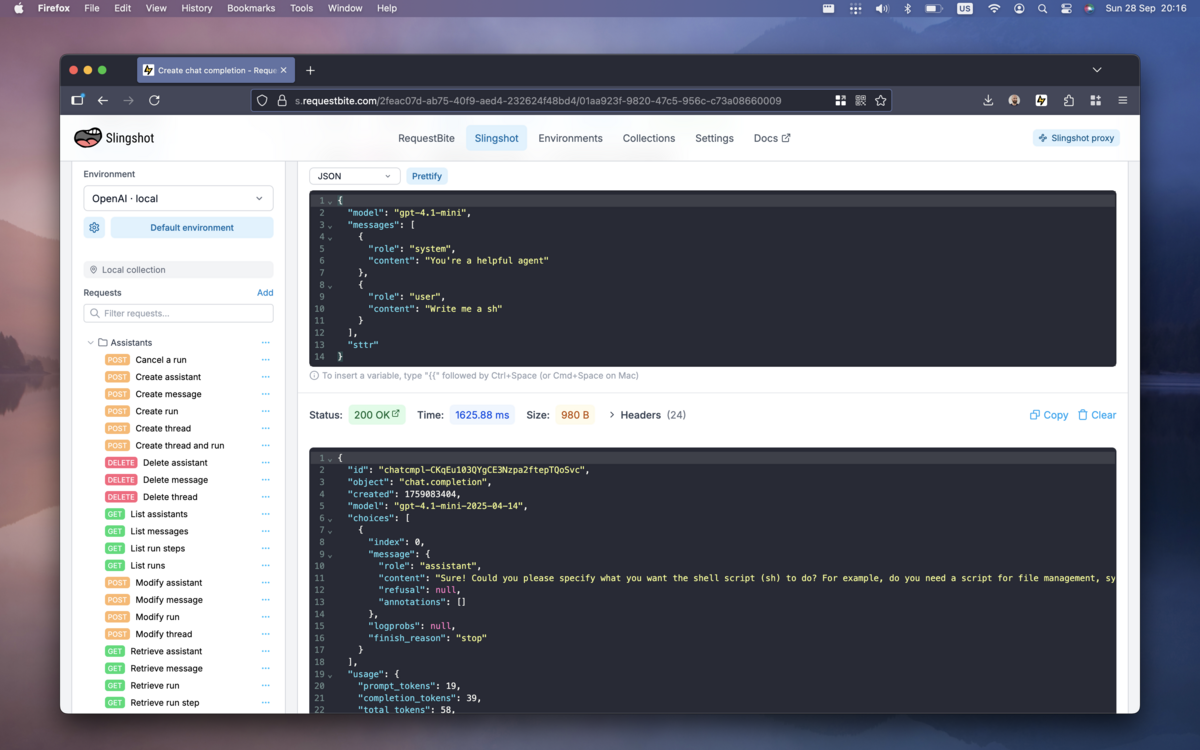
Neat!